Monday, April 28, 2014
Critique Reflection
For my character animation (see previous post), I received critique from my classmates on the design, technical aspects, and plot. They said the plot was simple and easy to follow with a good inciting incident and climax/resolution. Also, the the modeling of the house, furniture, and character were well done, especially with the time restrictions. Motion was good, and many people liked the first-person view. They liked many of my shots and camera movements which were smooth and followed the Rule of Thirds. However, a few criticized the fact that at one point a closing door went through the camera and that the door handles didn't turn as the main character (camera) opened the door. Next time, I will work on the minor details and focus more on working within time limits.

Wednesday, April 16, 2014
Character Animation - The Nightmare
My Blender Character Animation
"The Nightmare" -- The Thrilling Tale of a Zombie who Only Wanted a Hug
First, I will describe my thoughts the process of bringing this animation to life.
The modeling of the character was likely the most irksome part; he is low poly and hollow, which is sometimes visible at certain angles. His hair is almost nothing like I imagined, but I couldn't take the time to make it properly and instead just sculpted it out of a large UV Sphere.
Next, learning to rig a mesh was actually quite easy, though it could have been executed better. A full class tutorial would have probably helped us to know exactly what was expected of us while rigging our characters. I was specifically confused on how to make it loop naturally, and I certainly have not perfected this yet.
We simply were not given enough time for the animations themselves if we wanted a finished product that we could be proud of. There are several things that I had to rush and even completely skip over (like the window panes I wanted to add), and I was forced to use other models from sites like Blender Artists when I would have preferred making these props on my own, though I made sure these models were available for non-credited use. Rendering took a very long time as I had a much longer video than some of the other students with a larger file size, so this I did outside of class. Surprisingly, my own laptop at home runs Blender fairly well.
The post-processing for the video was definitely the easiest part. I was able to make most of what I wanted for audio in GarageBand, and I was able to work out any of my issues with relative ease, though the audio/video syncing problem had me momentarily stumped. I chose only beginning credits because that was all that was needed, though I might have added some eerie music at the end had I had end credits.
--------
Throughout the project, I was able to focus quite well, and though there are often conversations at my tables, they do not distract me from my work. Quite the contrary, when given the option to choose when to talk to my friends or keep silent, I am more productive. There were multiple times that I was frustrated with my work, as it did not always meet expectations.
Finally, I was successful with modeling my character (Neo's) face, but his hair and body suffered. Neo's movements were also a little rushed, but they weren't the central focus of the video. I chose a first person point of view in the storyboard phase. Were I to do this again--which I likely will as I would like to be a video game designer (most likely for an indie developer as I really appreciate being my own boss)--I would like to focus more on quality over deadlines. Thus, I am really looking forward to the independent portfolio class next year.
Really a great project!
Wednesday, November 13, 2013
Fun with Makerbot!
These are completely unrelated to Digital Media class, but they are truly AMAZING. Made with a 3-D printer!
 |
| I job shadowed at a computer software company that owns a 3-D printer. I never wanted to leave! |
 |
| N7 is meant to be red, so... I think I will paint it later. |
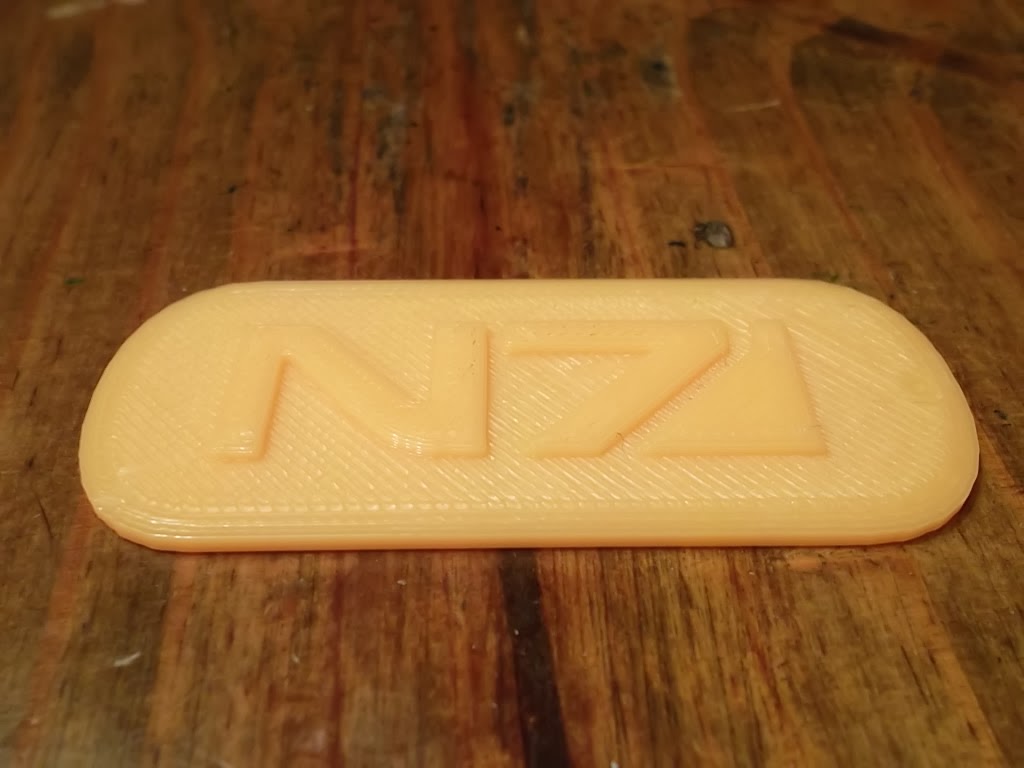 |
| This is the first thing I printed! It's an N7 dog tag from Mass Effect. |
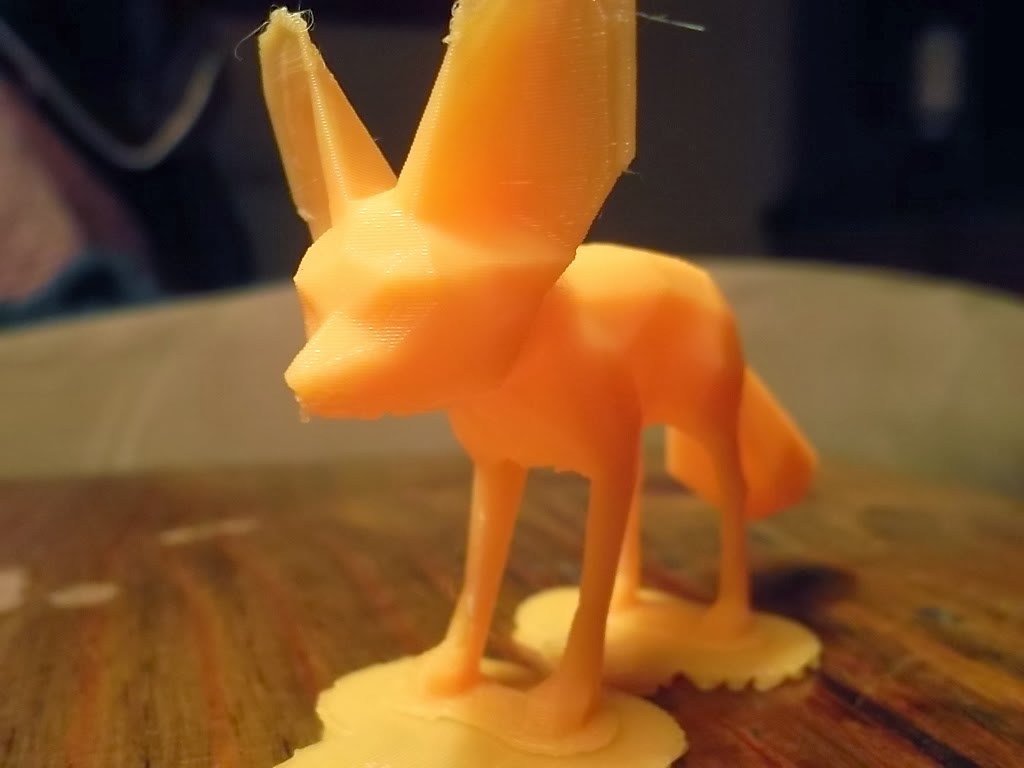 | ||
| He says, "I'm going to take you five tries, and then the knife you use on me will give you a battle wound." Jerk. |

 |
| He is really cute, even though he's messed up. |
 |
| "Enterprise, this is the away team. One to beam up." |
Monday, September 30, 2013
How to Animate Shape Keys (in Blender 2.68)
Shape keys can be used in Blender to create facial expressions and movements in order to animate a 3D character talking, smiling, laughing, showing anger, etc. It is best to begin practicing before animating your final character using the pre-made monkey head.
They can be found under the Object Data tab denoted by an upside down triangle, under the subheading "Shape Keys." Make sure to keep a base key for the original face, and make a keyframe of the base key at the start of the animation timeline!
You can form different shape keys in edit mode by simply having the shape key highlighted in object mode and making sure that all the other shape key sliders are at 0. The vertices can be manipulated to create different emotions and forming different sounds with the mouth in order to appear as though the character is speaking. Remember to always set your shape keys to 0 when they are not in use!
New shape keys should be created for every new shape the mouth must make to form each sound in a phrase. For example, the word "balloon" should ideally have five shape keys to make the sounds of "b," "a," "ll," "oo," and "n."
Shape keys can be made into keyframes in a similar way to objects under the template "Animation" at the top of the screen. The dopesheet summary will list all the shape keys you have created, and you can move the slider at each frame for each face you wish your character to make at each moment. This will take listening to the sounds over and over and over again and may involve deleting keyframes entirely or moving them to a different frame by right-clicking on the keyframes in the dopesheet and using "e" to move them.
Voices and sounds can be imported into Blender by changing the template to "Video Editing," and choosing the option "Add>Sound" in the toolbar at the bottom of the image sequencing timeline. Make doubly sure that the sound and animation begin at the first frame, and repeatedly listen to the sound to check that the animations and sounds align. Additionally, you may want to leave a few extra neutral frames (possibly even up to a couple seconds) after the animation has ended, to avoid abrupt endings or cut-offs.
In rendering, it is always best to render pngs of each frame and join them together in image sequencing afterwards. To add sound to the png sequence, simply have both the sound and the sequence in the video sequence editing box, and change the settings of the rendering (preferably to Dimensions>HDTV 1080p, or another preferred dimension, choosing a new location for output, Output>Quicktime if you have a Mac, and changing the settings in Output>Sound to ACC, or whatever sound file you want to use). Then just click Render>Animation and watch as the pngs are joined together with your added sound.
And now you can make your character talk!
~Rhiannon Enright
My Shape Key Monkey Animation
They can be found under the Object Data tab denoted by an upside down triangle, under the subheading "Shape Keys." Make sure to keep a base key for the original face, and make a keyframe of the base key at the start of the animation timeline!
You can form different shape keys in edit mode by simply having the shape key highlighted in object mode and making sure that all the other shape key sliders are at 0. The vertices can be manipulated to create different emotions and forming different sounds with the mouth in order to appear as though the character is speaking. Remember to always set your shape keys to 0 when they are not in use!
New shape keys should be created for every new shape the mouth must make to form each sound in a phrase. For example, the word "balloon" should ideally have five shape keys to make the sounds of "b," "a," "ll," "oo," and "n."
Shape keys can be made into keyframes in a similar way to objects under the template "Animation" at the top of the screen. The dopesheet summary will list all the shape keys you have created, and you can move the slider at each frame for each face you wish your character to make at each moment. This will take listening to the sounds over and over and over again and may involve deleting keyframes entirely or moving them to a different frame by right-clicking on the keyframes in the dopesheet and using "e" to move them.
Voices and sounds can be imported into Blender by changing the template to "Video Editing," and choosing the option "Add>Sound" in the toolbar at the bottom of the image sequencing timeline. Make doubly sure that the sound and animation begin at the first frame, and repeatedly listen to the sound to check that the animations and sounds align. Additionally, you may want to leave a few extra neutral frames (possibly even up to a couple seconds) after the animation has ended, to avoid abrupt endings or cut-offs.
In rendering, it is always best to render pngs of each frame and join them together in image sequencing afterwards. To add sound to the png sequence, simply have both the sound and the sequence in the video sequence editing box, and change the settings of the rendering (preferably to Dimensions>HDTV 1080p, or another preferred dimension, choosing a new location for output, Output>Quicktime if you have a Mac, and changing the settings in Output>Sound to ACC, or whatever sound file you want to use). Then just click Render>Animation and watch as the pngs are joined together with your added sound.
And now you can make your character talk!
~Rhiannon Enright
My Shape Key Monkey Animation
Sunday, September 22, 2013
How to Rig a Mesh (of a Hand) in Blender 2.68
You rig a mesh in Blender by deforming it either with armatures of with vertex keys. I will only discuss the technique using armatures.
The first step, obviously, is to create a mesh. Extrude or subdivide the section that you want to bend (the joint). For the finger, extrude and scale the mesh three times (to create four lines) for the joint.
Place the cursor at the bottom of the mesh you just made, and add an armature (single bone). In Edit Mode, use g to grab the top of the bone and resize it, positioning the top at the middle of the joint. Press e to extrude another bone out of the top of the last one, and make it extend to the end of the mesh.
Next, in Normal Mode, click the MESH first, then shift-click the armature, and press ctrl-p to make the armature a parent for the child mesh. Select "armature deform" and "with automatic weights" for now. (You can now ctrl-d and move and resize the duplicated things to create multiple fingers, and possibly use a UV sphere to create a palm. Make sure to use ctrl-j to join all the meshes together. RENAME THE NEW BONES.) You can also set X-Ray to on and Names to see the names of each bone and through the mesh.
You can move the bone in Pose Mode to test it. *Use alt-r to reset the bone to its original position*
You probably see issues with the mesh deforming in a random way while moving some of the bones. This is because Automatic Weights has much difficulty choosing which vertices to connect to the bone. This can be fixed in Edit Mode by using the assign and remove buttons to (surprise, surprise) assign and remove different vertices to the highlighted bone. Continue to work with this until the bone moves (slightly) realistically.
To move the finger as a whole instead of posing each individual bone (an exhausting process), use Inverse Kinematics (IK) and Constraints. Select the bone, go to "Bone Constraints" and set "IK Constraint." Change the Chain Length setting to the amount of connected bones you want to move together, and mess with some of the other settings if you're an experienced Blender user. If not, these settings are fine for what you are attempting.
You can now use keyframes to manipulate the bones and make a simple hand animation. Congratulations!
~ Rhiannon Enright
Link to the Video of My Animation
The first step, obviously, is to create a mesh. Extrude or subdivide the section that you want to bend (the joint). For the finger, extrude and scale the mesh three times (to create four lines) for the joint.
Place the cursor at the bottom of the mesh you just made, and add an armature (single bone). In Edit Mode, use g to grab the top of the bone and resize it, positioning the top at the middle of the joint. Press e to extrude another bone out of the top of the last one, and make it extend to the end of the mesh.
Next, in Normal Mode, click the MESH first, then shift-click the armature, and press ctrl-p to make the armature a parent for the child mesh. Select "armature deform" and "with automatic weights" for now. (You can now ctrl-d and move and resize the duplicated things to create multiple fingers, and possibly use a UV sphere to create a palm. Make sure to use ctrl-j to join all the meshes together. RENAME THE NEW BONES.) You can also set X-Ray to on and Names to see the names of each bone and through the mesh.
You can move the bone in Pose Mode to test it. *Use alt-r to reset the bone to its original position*
You probably see issues with the mesh deforming in a random way while moving some of the bones. This is because Automatic Weights has much difficulty choosing which vertices to connect to the bone. This can be fixed in Edit Mode by using the assign and remove buttons to (surprise, surprise) assign and remove different vertices to the highlighted bone. Continue to work with this until the bone moves (slightly) realistically.
To move the finger as a whole instead of posing each individual bone (an exhausting process), use Inverse Kinematics (IK) and Constraints. Select the bone, go to "Bone Constraints" and set "IK Constraint." Change the Chain Length setting to the amount of connected bones you want to move together, and mess with some of the other settings if you're an experienced Blender user. If not, these settings are fine for what you are attempting.
You can now use keyframes to manipulate the bones and make a simple hand animation. Congratulations!
~ Rhiannon Enright
Link to the Video of My Animation
Subscribe to:
Posts (Atom)